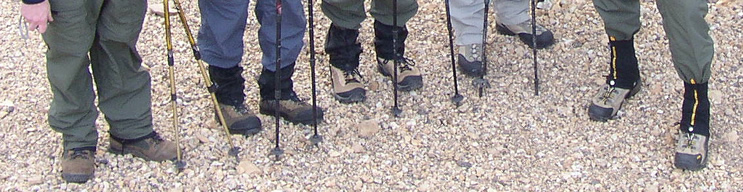
Your Desert "Dogs"
Your feet will get you into the Canyon and you’ll need them to get you out. Hands and knees are not a recommended mode of
transport. So, you’ll need to protect those assets. This starts before your boots make contact with the trail, as once again, preparation comes into play. Then there’s listening to what your feet are telling you while you’re on the trail. But, before we make those preparations and hit the trail, we need to understand…
To help navigate through the information contained here,
you can read the information in its entirety by scrolling through the page,
or use the choices below to go directly to the section of interest.
Enemies of the Feet ·The Prime Directive ·Preparing Your Feet for Hiking · Precautions While on the Trail ·While in Camp ·Treating Foot Problems
The Enemies of Your Feet
Moisture:
- Each foot comes equipped with around 250,000 sweat glands. They are themselves moisture-machines capable of producing over a pint of sweat every day. And, this is even before you add environmental factors like rain, snow and an occasional stream crossing.
- Accumulated moisture around your foot causes it to react much like your fingertips when in the shower too long. Walking on that soft, wrinkled, folded skin leads to separation of skin layers, and spreading blisters that can eventually split open and bleed. Called “maceration” it is quite painful and can be debilitating.
- Moisture can also serve to soften the skin and more readily conduct friction to key contact points between your foot and the inside surfaces of your footwear, which creates heat that leads to blisters.
- The moist warm environment inside your boot is also home to a variety of bacteria and fungi who like nothing better than to multiply and feast first on dead skin and calluses before moving on to the live stuff."
Heat (Yes, again.):
- The surfaces that you’ll be walking on in the Grand Canyon can have a ground temperature far in excess of the surrounding air temperature. It is not unusual to find ground temps in the 110–115°F range when the air is as cool as 80°F.
- Inside the boot your foot will sweat in an effort to cool itself.
- See “Moisture” above.
- Heat may also result in the development of itchy rashes (e.g., heat or sweat rash).
Dryness:
- While it may seem counter-intuitive, dry spots can also develop on the soles of your feet over the course of the trip. Worth keeping an eye out for during the daily foot inspection that you should be
conducting.
- Less a factor on the trail, but one that develops with those who frequently wear sandals during their off-trail hours are heel calluses that can end up forming painful cracks. These cracks can form sores if left unattended prior to being placed into a pair of hiking boots and taken for a spin.
The Neighborhood:
- We’ve discussed the factors of moisture, heat, dryness and the natural flora that comprise the local environment for your feet.
- Socks are also residents of the neighborhood that can be either a positive or negative addition. More on this later.
- The inside surfaces of your footwear are also a key contributor to your foot’s experience in the neighborhood. Poor footwear size selection, quality of construction or a design that’s not compatible with the structure of your particular feet are the equivalent of driving a car with insufficient leg room, an uncomfortable seat and headroom that is so limited your head hits the roof every time you go over a bump. Over the long haul (and sometimes not that long of a haul) these factors will result in injury.
Mileage:
- Obviously, the longer you expose your feet to these conditions each day and the greater the number of consecutive days of travel, the higher the likelihood that an accumulation of minor issues left unaddressed will develop into problems.
- The nature of the terrain can also contribute to potential problems. Long, steep downhill stretches, unstable scree fields, sandy beaches, graveled washes, and lengthy side-hilling traverses constitute a few examples.
Pack Weight:
- The heavier the pack, the more stress that is placed on the 52 bones, tendons, ligaments, muscles, skin and nails of your feet.
- The heavier the load, the more support your feet require to avoid injury. That extra support translates into a heavier boot, and every additional pound of boot weight is the equivalent of adding an extra 5 pounds to your pack’s weight. Lighten up, Francis.
|To Top |
The Prime Directive
- Your feet must remain happy!
Note: This significantly predates Starfleet’s "Prime Directive" (a.k.a. General Order #1). The fundamental guiding principle of the United Federation of Planets, which dictates that there can be no interference with the internal development of pre-warp civilizations, consistent with the historical real world concept of Westphalian sovereignty. Feet obviously preceding warp-drive propulsion technology.
|To Top |
Preparation (Avoiding the Agony of Da Feet)
Are you a Tenderfoot?
- If you are unaccustomed to hiking for miles carrying a loaded pack some consideration should be given to preparing your feet for that abuse… But, this really shouldn’t be an issue, right? I mean since you’ve dedicated to the conditioning regimen that you’ve undertaken
to prepare for the trip.
- The best answer is to take some time before your trip to get them accustomed to their “neighborhood” by taking them for strolls of increasing length and gradually increasing pack load.
- In addition to, or as an alternative you should wear your boots as much as you can in the weeks leading up to your trip. Even if it’s just around the house.
- Going barefoot or wearing sandals also helps.
- There are also some methods to toughen up the skin on the soles of your feet:
- Some advocate using twice daily applications of rubbing alcohol. This does tend to dry out your skin and while some swear by it, in my experience the increased dryness does more harm than good.
- There is also a product called Tuf-Foot® that I’ve used with better results. Begin using the product 3-4 weeks prior to your planned departure.
- Pre-Trip Foot Preparation:
- Toenail Trimming:
- Appropriately trimmed nails will help avoid nails from contacting the front of you boot and causing damage to them (a.k.a. “Black Toe” and “Toe Jam”). It also helps prevent sharp nails from cutting into adjacent toes.
- Trim toenails straight across the nail.
- Look for and remove ingrown edges and sharp corners.
- Use a file to remove rough edges by filing the top of the nail smooth down toward the front of the toe.
- Do this several days prior to the trip in case you were a bit too aggressive and nicked a toe or cut into a quick.
- Callous Reduction:
- Callouses are a sign of poor biomechanics and/or improperly fitted footwear.
- Their presence contributes to continued improper fit and they create points for friction to cause problems during your trip.
- A few weeks prior to your departure begin working to soften and remove calluses. This can be accomplished using moisturizing foot cream and a pumice stone or callous file.
- Note: These techniques will not work on the personalities of the more hardened and uncaring members of your hiking team.
- Fissure Repair:
- Fissures are cracks that can develop in callused skin as calluses become larger or when they are subjected to dryness, as with frequent wearing of sandals.
- Left unattended, fissures can split open penetrating into deeper underlying tissues, begin bleeding and become infected.
- Several weeks before the trip begin a program of applying a moisturizing foot cream and when under control work on callus reduction.
- Boot Selection:
- See the “Gear” page for a more detailed description of boot selection criteria. Here are some highlights specific to preventing foot problems.
- Design Criteria:
- There are an incredible number of choices when confronted with boot designs that run the spectrum from heavy backpacking/mountaineering boots to lightweight trail-runners. Then there are the variations from shoe to shoe within a particular design category.
- From a foot protection standpoint if you’re going to carry heavy loads, let’s say 40 pounds or more, you will need a sturdy, high-cut (read “heavier”) boot to provide the stability and support required to schlep that load.
- Get your load down to 35 lbs and below, and the options start to open up for lighter weight and lower cut footwear.
- I’ll insert a disclaimer here that your size and weight also matter in making these choices as the heaviness of a load is absolutely relative to those factors. Likewise if your ankles are not accustomed to the stresses of hiking steep slopes and traversing rubble strewn trails, or if you have sports injuries that seem to predispose you toward turning or spraining an ankle, you should probably err on the side of more support in the form of a mid or full cut design.
- Breathability is also an extremely desirable feature that will help keep foot moisture down. Unfortunately, it is inversely proportional to boot weight. Heavier, sturdier, high-cut designs will be hotter and trap more moisture. The lighter designs that incorporate mesh panels are great at shedding moisture. But, not so good at protecting the foot from an occasional cactus spine poke. Life’s full of trade-offs, right?
- Breathable/Waterproof liners like Gore-Tex® are fine if you are looking for a multi-purpose boot that you plan to use in inclement weather on trips outside the Canyon. For Canyon travel, they can be hotter than companion models without the liner. Hotter = More Moisture (despite the breathability claims). Since it tends to be pretty dry in the Canyon you can easily get by without the liners. And, if it should rain and your boots get soaked, well, the more breathable they are the faster they dry out. In fact, you can easily walk them dry.
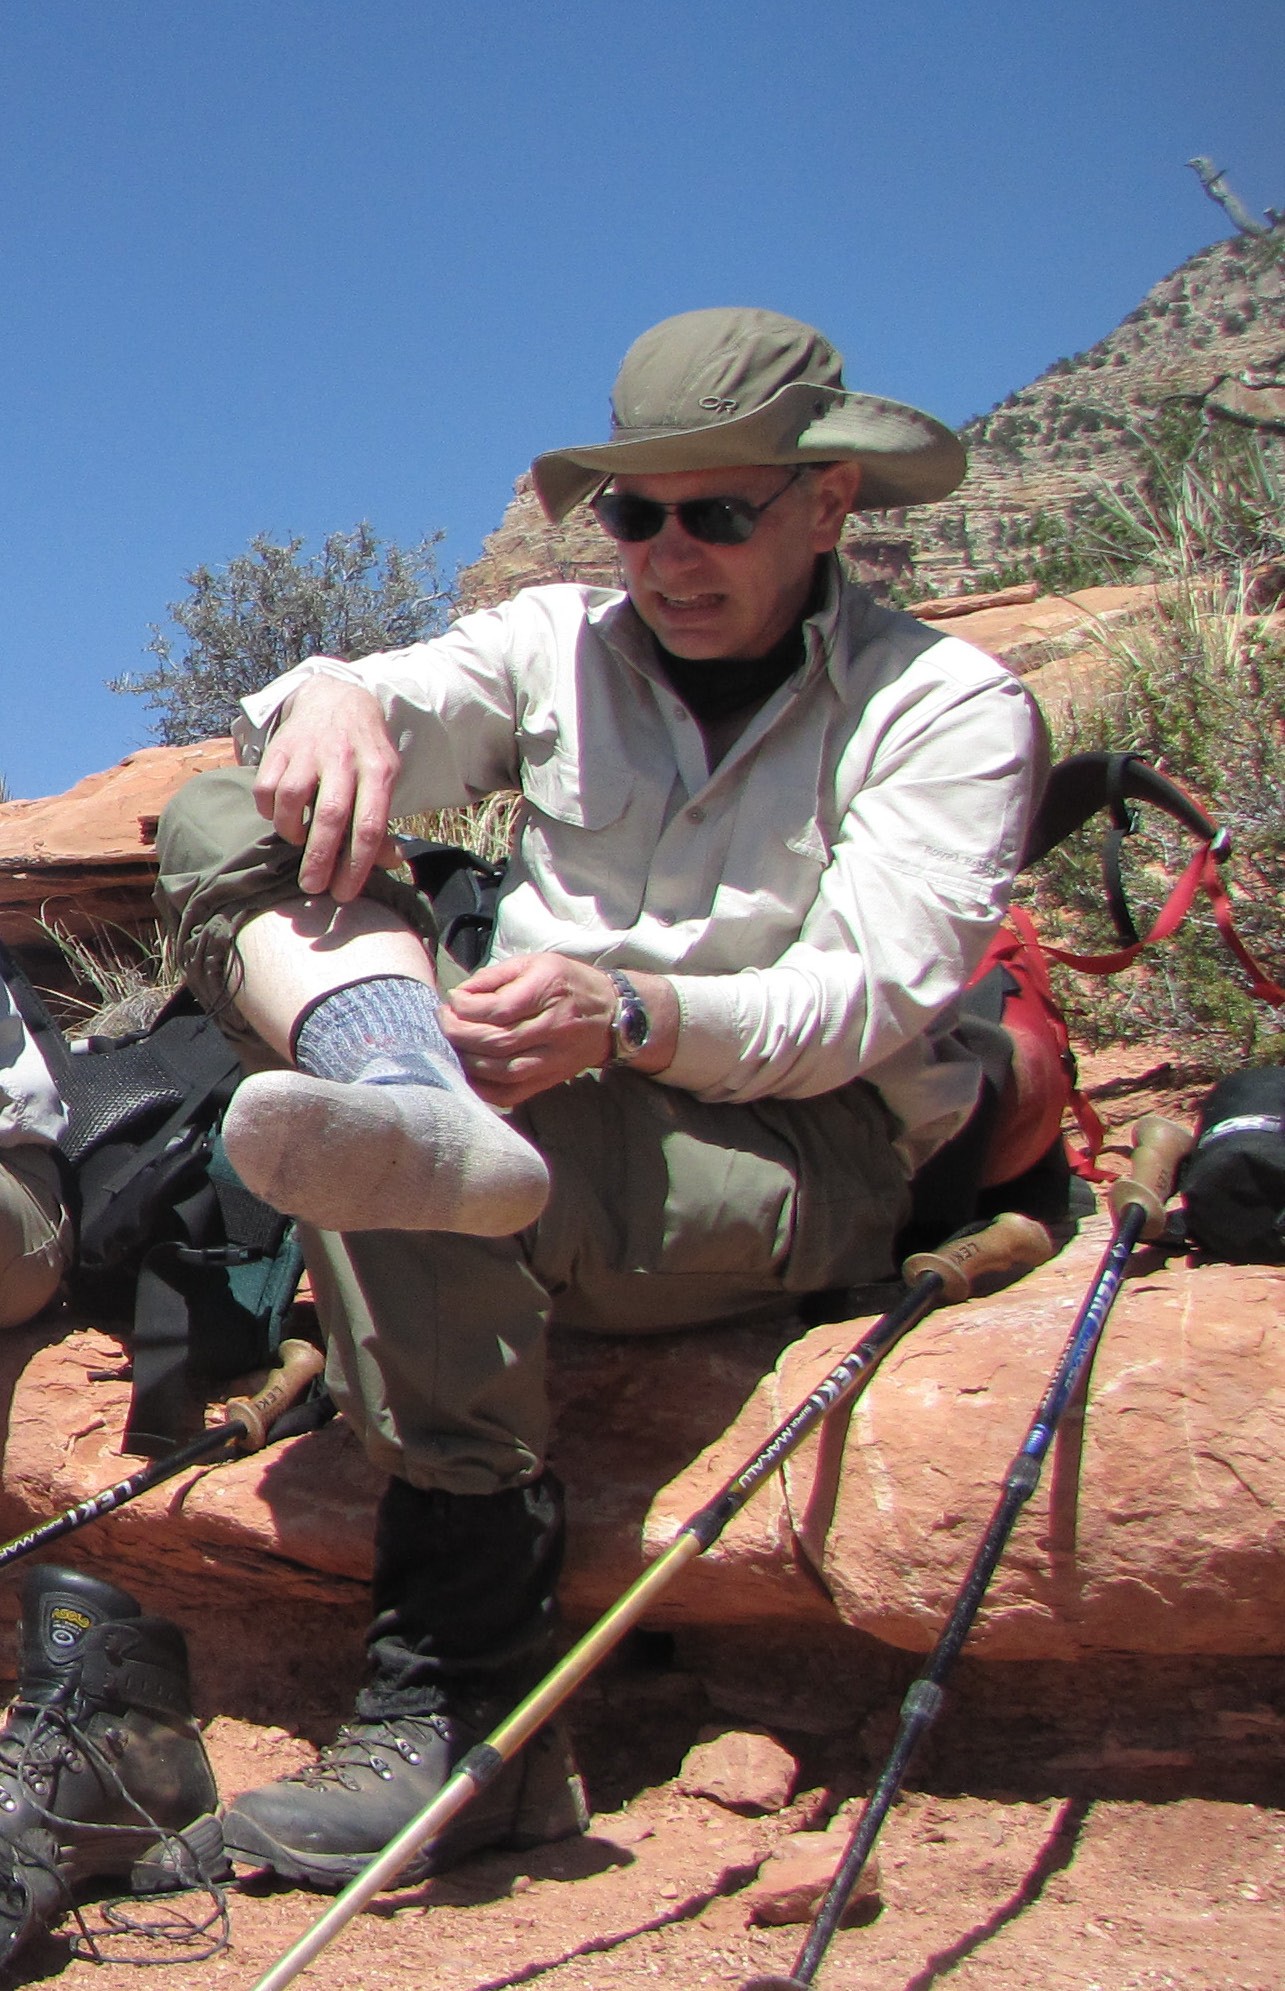
- Fit, Fit and Fit!
- Much like Drink, Drink, Drink and Eat, Eat, Eat, boots that don’t fit well will become Hell, Hell, Hell and the bane of your existence in the Canyon.
- Find a well stocked outdoor specialty shop and a knowledgeable, patient salesperson and try on lots of pairs.
- Try them on with the socks you plan to hike in. Parade around the shop. Try them going up, down and sideways on inclines. Turn on your “Spidey-Senses” and ferret out the slightest of sensations that might be considered uncomfortable (e.g., pressure points, toes hitting the
front of the boot when pointed downhill, seams that don’t feel quite right,
etc.). Ask lots of questions, and then pick the pair the fits best and meets your design criteria (see below).
- If nothing feels good. Head to a different shop with other brands… Repeat.
- Once you have purchased a pair, bring them home and wear them around the house using the socks you plan to hike in. Keep your Spidey-Senses going.
- If something’s off and doesn't feel quite right, try different weight sock and liner combinations and vary the lacing in an effort to resolve the discomfort issue. Sometimes issues can be resolved by swapping out the insole that came with the boot for one of the myriad of specialty
insoles or footbeds that are offered in the same specialty shops that sold you the boots. Again, a knowledgeable sales person can steer you in the right direction for an insole that might address your problem. Note that heavier boots require a break-in period, so you’ll need to use some judgment as to whether to comfort issues your experiencing might resolve themselves with additional wear. Wearing them around the house for a longer period of time may help answer that question. For light weight boots, the break-in period can be nothing or next to nothing.
- If all of these efforts fail, take them back. Most shops will accept them back for an exchange or refund if they have not been worn outdoors… Find another shop and repeat.
- If all feels good, take them for a spin on a local trail. See how they feel on repeated short hikes, being sure to get some testing in on up-hills and down-hills. Continue being hyper-aware and isolate any points of discomfort. Sock and lacing variations can be used in an effort to resolve them as can a different insole. Sometimes a strategically placed piece of duct tape on the inside surface of the boot over a suspected contact point can resolve the issue.
- Gradually increase the duration of your hikes, keep looking for issues and working on variations to resolve them. Hopefully, by now things have settled down and your boots and feet have reached an “understanding.”
- Sock Selection:
- Select hiking socks made of a synthetic, synthetic blend or wool only. NEVER COTTON.
- Sock material names to look for: CoolMax® or Olefin®. Smartwool® are particularly good
when wet conditions are expected as they continue to insulate when wet.
- You want your socks to wick moisture, hold onto it, and keep it away from your foot. Cotton is very poor at wicking, gets saturated quickly and is very slow to dry.
- Your socks also serve to protect your foot from direct contact with the inner surfaces of your boot and they provide cushioning and insulation between the sole of your foot and the ground. That insulation can be helpful when the ground is very cold and very hot.
- The heavier your socks, the more moisture they will hold, but they will also be hotter.
- Liner socks are a very thin sock that is put on prior to your hiking sock. They too should be made of synthetic fiber (e.g., polypropylene) or silk. Their purpose is to further reduce the potential for developing blisters. There is considerable debate as to their value, but I’m a believer. The thinking is that the thin layer of synthetic or silk allows moisture to pass through and into the hiking sock where it is held.
The liner sock then creates a sort of buffer between your foot and the moisture-laden hiking sock. That bufferalso serves to reduce blister-generating friction that otherwise may develop once the hiking sock gets too moist.
- Decisions, decisions, decisions.
- Our advice, buy a few different weights of socks, in the medium to heavy category, and a pair of liner socks. Then play around with them in different combinations. Pick the combo that seems to be most comfortable for you. My experience has been that lighter weight socks wet out faster and don’t provide very much cushioning. This can mean more stops for sock changes, and you begin to feel the effects of that lack of extra “cush” toward the end of a long day. But everybody’s different, so experiment on those shorter preparatory day-hikes to dial-in your preferences.
- If you are prone to developing blisters on your toes, look into Injinji Tetrasok® toe socks. They isolate each toe and
help prevent blistering.
- Prone to Athlete's Foot?
- Treat it prior to the trip and strictly adhere to moisture avoidance suggestions provided here.
- Carry a small tube of medication for treatment should you experience a flare-up while on the trail.
- Moisture Avoidance 101 – Phase I:
- Apply rubbing alcohol to dry feet. An anti-perspirant can also be applied if moisture seems to be a persistent problem.
- Dust feet with a moisture-absorbing foot powder (e.g., Zeasorb®, Odor-Eaters®, Gold Bond®) prior to putting on your liner and hiking socks.
- Preventing Maceration:
- If you recall, "maceration" is the painful condition that results from walking on the skin folds that occur on the soles of your feet when they're wet for long periods of time (i.e., like the wrinkling that occurs to finger tips when in water too long.)
- Prior to donning socks and boots, apply a light coat of moisture-absorbing foot powder or a beeswax and lanolin preparation such as Kiwi’s Camp Dry. A lubricant is preferable over a powder, but too much can lead to softening of the skin and blisters. So use it sparingly and mainly on the toes.
- More preferable still are non-greasy sports ointments such as Hydropel®, BodyGlide®, or SportsSlick® . These repel moisture, preventing its absorption into the skin on the soles of your feet.
- An anti-perspirant can also be used to help control and reduce moisture.
- Prone to Blisters (Despite your best efforts to get your boot fit and sock combo right?):
- Tape the trouble spots before setting out using a porous medical adhesive tape (e.g., Micropore® paper tape or Leukotape®). To maximize adhesion, prepare the surface with rubbing alcohol prior to application.
- Avoid applying the tape too tightly so that is restricts circulation. Also avoid overlapping and creating folds and these can produce the blisters you’re trying to avoid.
- Gaiters:
- Buy a pair of short lightweight gaiters, preferably not waterproof so as to promote breathability.
- These will help prevent pebbles and other debris from finding their way into your boots and making your feet unhappy.
|To Top |
On the Trail Precautions
 Don't Procrastinate! Don't Procrastinate!
- As soon as you feel something’s not quite right with your feet, stop and DO SOMETHING about it immediately.
- Remove: fragments, pebbles, junk, debris, cactus spines, seeds, burrs, meteorites, etc.
- Resolve: bunched socks, shifted sock-seams, irritating boot liner rubbing, etc.
- Wiggle While You Walk -- Your toes that is
- Wiggle them inside your boots every now and then, especially when heading downhill.
- It will help relieve the tension that may start to develop in the ball and front portion of your foot.
- Moisture Avoidance 102:
- Every couple of breaks take off your boots and socks, turn the socks inside out and let them dry a bit before heading out again.
- Or, rotate into a dry pair of socks, and hang the damp pair from your pack to dry out prior to the next break.
- Recharge the “Dogs”:
- Elevate your feet during your breaks.
- Try some simple foot exercises to stretch things out -- After boots are removed, flex your toes forward and wiggle, then flex the toes backward and wiggle.
| To Top |
When in Camp
- Moisture Maintenance:
- Take a boots-off break upon arriving in camp.
- Rinse out your socks and let the air dry if water is available, otherwise turn them inside out and let them dry.
- Pull out your boot insoles and spread the tongue of your boots wide to facilitate drying.
- Wash Your Feet:
- Soak them in a stream if you can. Or, if water availability is a problem, wipe them with a dampened cloth.
- Allow them to dry thoroughly.
- Moisturize if Dryness is Present -- Applying a moisturizing foot cream.
- Change into a dry pair of socks, applying foot powder if drying is not an issue.
- Avoid wearing socks inside your sleeping bag if they tend to make your feet sweat.
- Before starting out the next day:
- Prep your feet by wiping off old powder and any collected debris.
- Apply a new dusting of a moisture absorbing foot powder.
- Then don a nice dry pair of socks and liners.
| To Top |
Treating Foot Problems
"Hot Spots":
- These encompass a broad category of issues that include just about anything you sense as being not quite right with your feet while on the
trail.
- First order of business: STOP and address it.
- Cover it: You may see some redness that could be the early stages of a blister, but even if you don’t see anything, still cover it. Luekotape® or Micropore® paper tape works well because it conforms nicely to the feet when applied. Both of these tapes are breathable and preferable to those that trap moisture, like duct tape. But if duct tape is all you have, by all means use it. Just be sure to remove it to let things dry out as time permits. Band-Aids® don’t work so well as they tend to shift position under stress and not stay put.
- “Cover it” can also apply to the inner lining of your boot. Sometimes a well placed piece of duct tape on the inside surface of your boot where it feels like the discomfort is originating might well solve the problem and it will avoid you having to muck about with patches on your feet.
Blisters:
- If a blister is beginning to develop that has not yet filled with fluid, break out a blister padding product. These include: Moleskin®; Moleskin Plus® (A heavier duty and more cushioning version of Moleskin); Molefoam® (This is a Moleskin that
has been bonded to latex for extra padding); Spenco Adhesive Knit® (This is a material that is thinner than Moleskin, but it has excellent adhesive properties); Spenco 2nd Skin® (This material is a sterile gel that comes in a sheet form. A piece slightly larger than the blister is cut and placed over the blister. It is then covered with a larger patch of Spenco Adhesive Knit). Other good blister treatment products include: Spyroflex® (This is a laminated open-cell dressing with a breathable, stretchy outer knit); pre-cut Skin Savers® (These come in several sizes, but the 2”x2” Blister Dressings and 4”x4” Abrasion Dressings, seem to cover most situations); and J&J Blister Block® (These are also pre-cut, come in various sizes and are essentially a stick-on cushion).
- Hints:
- Cut all of these “patches” so they have rounded edges, they will stay in-place better.
- Apply the patches to dry skin to improve adhesion. Alcohol swabs can be used to aid drying. Tincture of benzoin swabs can be used in more difficult cases when you want to be sure the cover will stick.
- Before applying the patch place a small amount of antibiotic ointment on the affected area to minimize the risk of infection.
- If you have a blister cover in-place roll socks on and off to help prevent dislodging the patch.
- Change these patches 2 – 3 times a day.
- The Downsides of Duct Tape (Yes, I know... Horror of horrors, Foul, Sacrilege, Blasphemer! It’s hard to believe that there is
a downside to this most universal of repair materials).
- There is a downside in its use for blister treatment -- It tends to trap moisture which can hasten an infection.
- It will also stick to the wound, often resulting in an ouch when removing it.
- It does work well otherwise and can be the default of choice if other breathable tapes are not available.
- Just remember to allow drying 3 to 4 times a day.
- The "Ouch Factor" on removal can also be minimized by applying a small amount of moisture absorbing foot powder or antibiotic
ointment to the wound prior to applying the tape.
- Fluid-Filled Blisters:
- These need to be punctured to drain the fluid.
- Puncture the blister using a flame sterilized needle near the base. Make an additional hole or two to allow foot pressure to force out any additional build-up of fluid.
- It is best to leave the skin intact and only cut it away once the underlying skin has had time to harden.
- If the skin of a deflated blister causes discomfort while walking, you may need to remove it. It can be cut away using a pair of sterilized
scissors.
- Clean the area and apply an antibiotic ointment and keep covered.
- Air drying periodically will help hasten the healing process.
- When you have a chance, removing the patch and allowing your feet and the blister to dry out with the aid of the sun (avoiding sunburn of course) really helps speed the healing process.
- Keep in mind that if you develop a blister, it is a sign that you have failed to listen to what your feet were trying to tell you. You are a procrastinator, bad, and probably a worthless human being. At least that’s what our mothers told us.
Maceration:
- Unfortunately, there are no quick fixes for maceration once it has developed. All the more reason to listen to your feet.
- Treatment is focused on drying your feet by applying moisture absorbing powders and taking every opportunity to expose your feet to the air. The latter is not easy to do when there are miles to be covered.
| To Top | |
 WildGeeseAdventures.com